
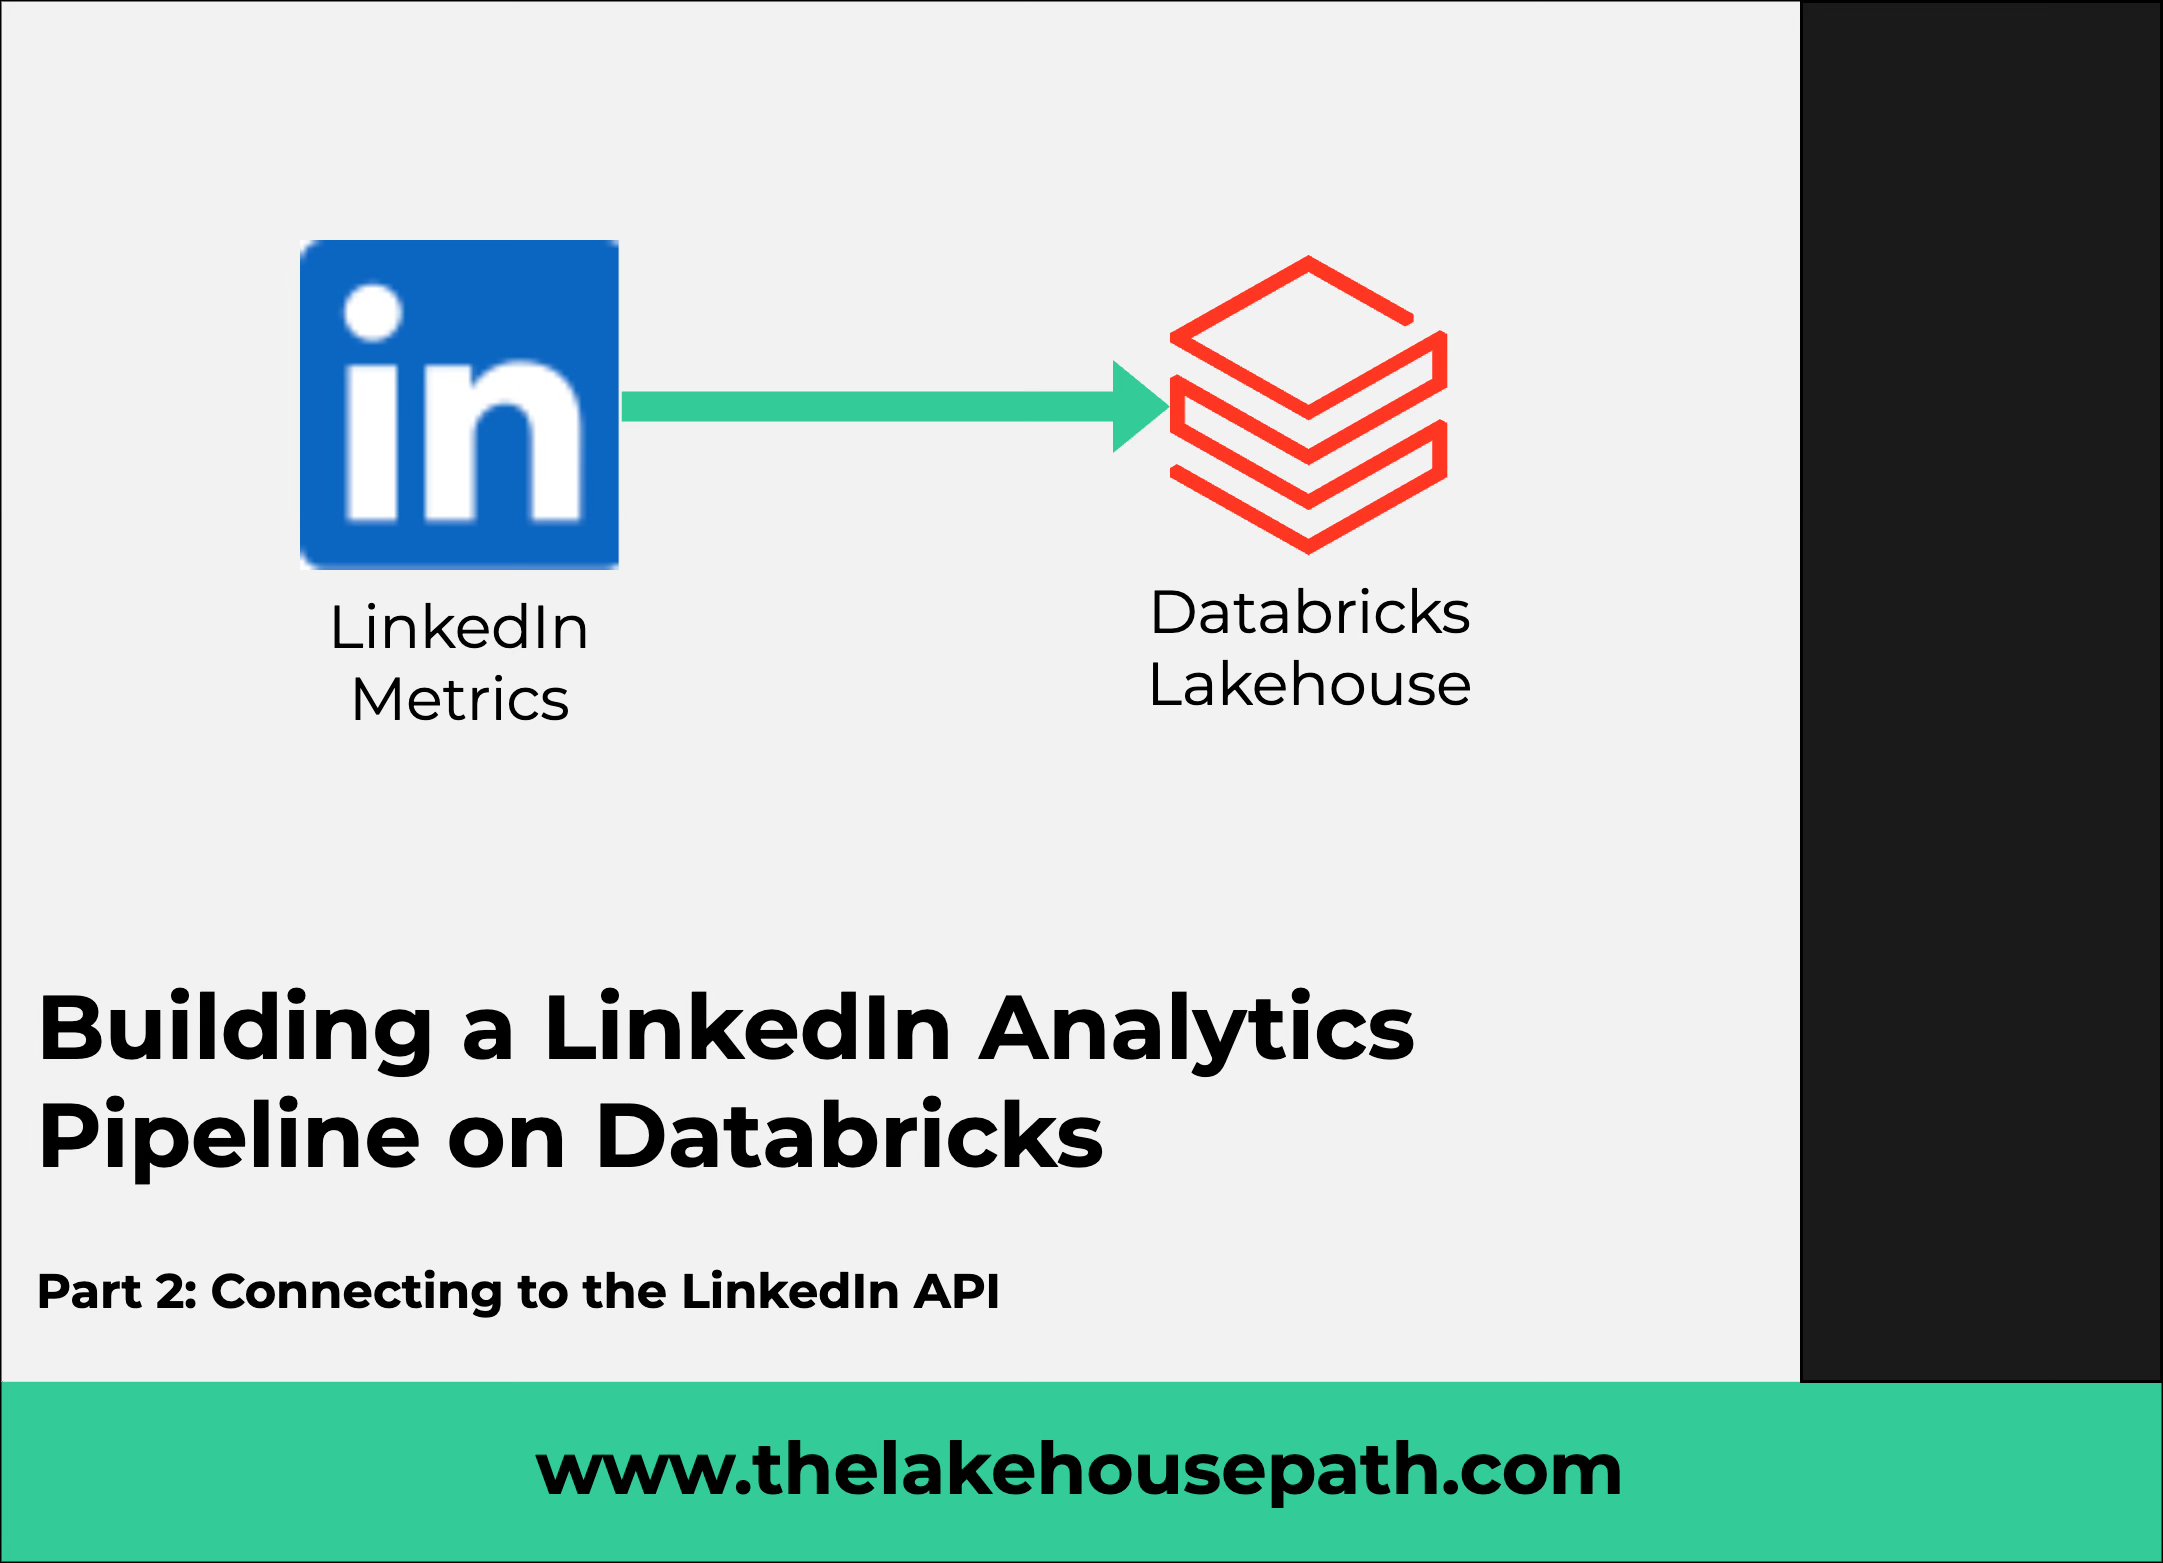
Building a LinkedIn Analytics Pipeline on Databricks — Part 2: Connecting to the LinkedIn API
Part 2 of 4 of the Series on getting LinkedIn data into Databricks

This is the second post in a four-part series. Part 1 set up the project scaffold with Declarative Automation Bundles. Part 3 covers building the medallion pipeline with Declarative Pipelines. Part 4 covers building a dashboard and cost of running this pipeline.
In Part 1 we set up the project structure and deployed the three schemas and the landing volume to our dev workspace. Now we need to fill that volume with data.
This post covers everything required to pull your LinkedIn analytics via API: getting access, authenticating, calling the right endpoints, handling a few quirks the documentation doesn’t warn you about, and writing the results to the landing volume we created in Part 1.
LinkedIn API access
LinkedIn’s API is not a developer-friendly, open ecosystem. In order to use the APIs you need to own a LinkedIn Page for an organization, create a developer application, and apply for access to the Community Management API. Once that’s in place, you can fetch analytics data for your personal profile and your organization. In this series we focus on the personal profile.
Here’s the full process.
If you ask yourself why I did not use some Agent for automation, this is a valid question. My intention was to create an Enterprise grade process that uses reliable APIs with minimal cost. You can as well set up an Agent that pull the data from LinkedIn. If you have done that, feel free to contact me. I would be interested in how you achieved this.
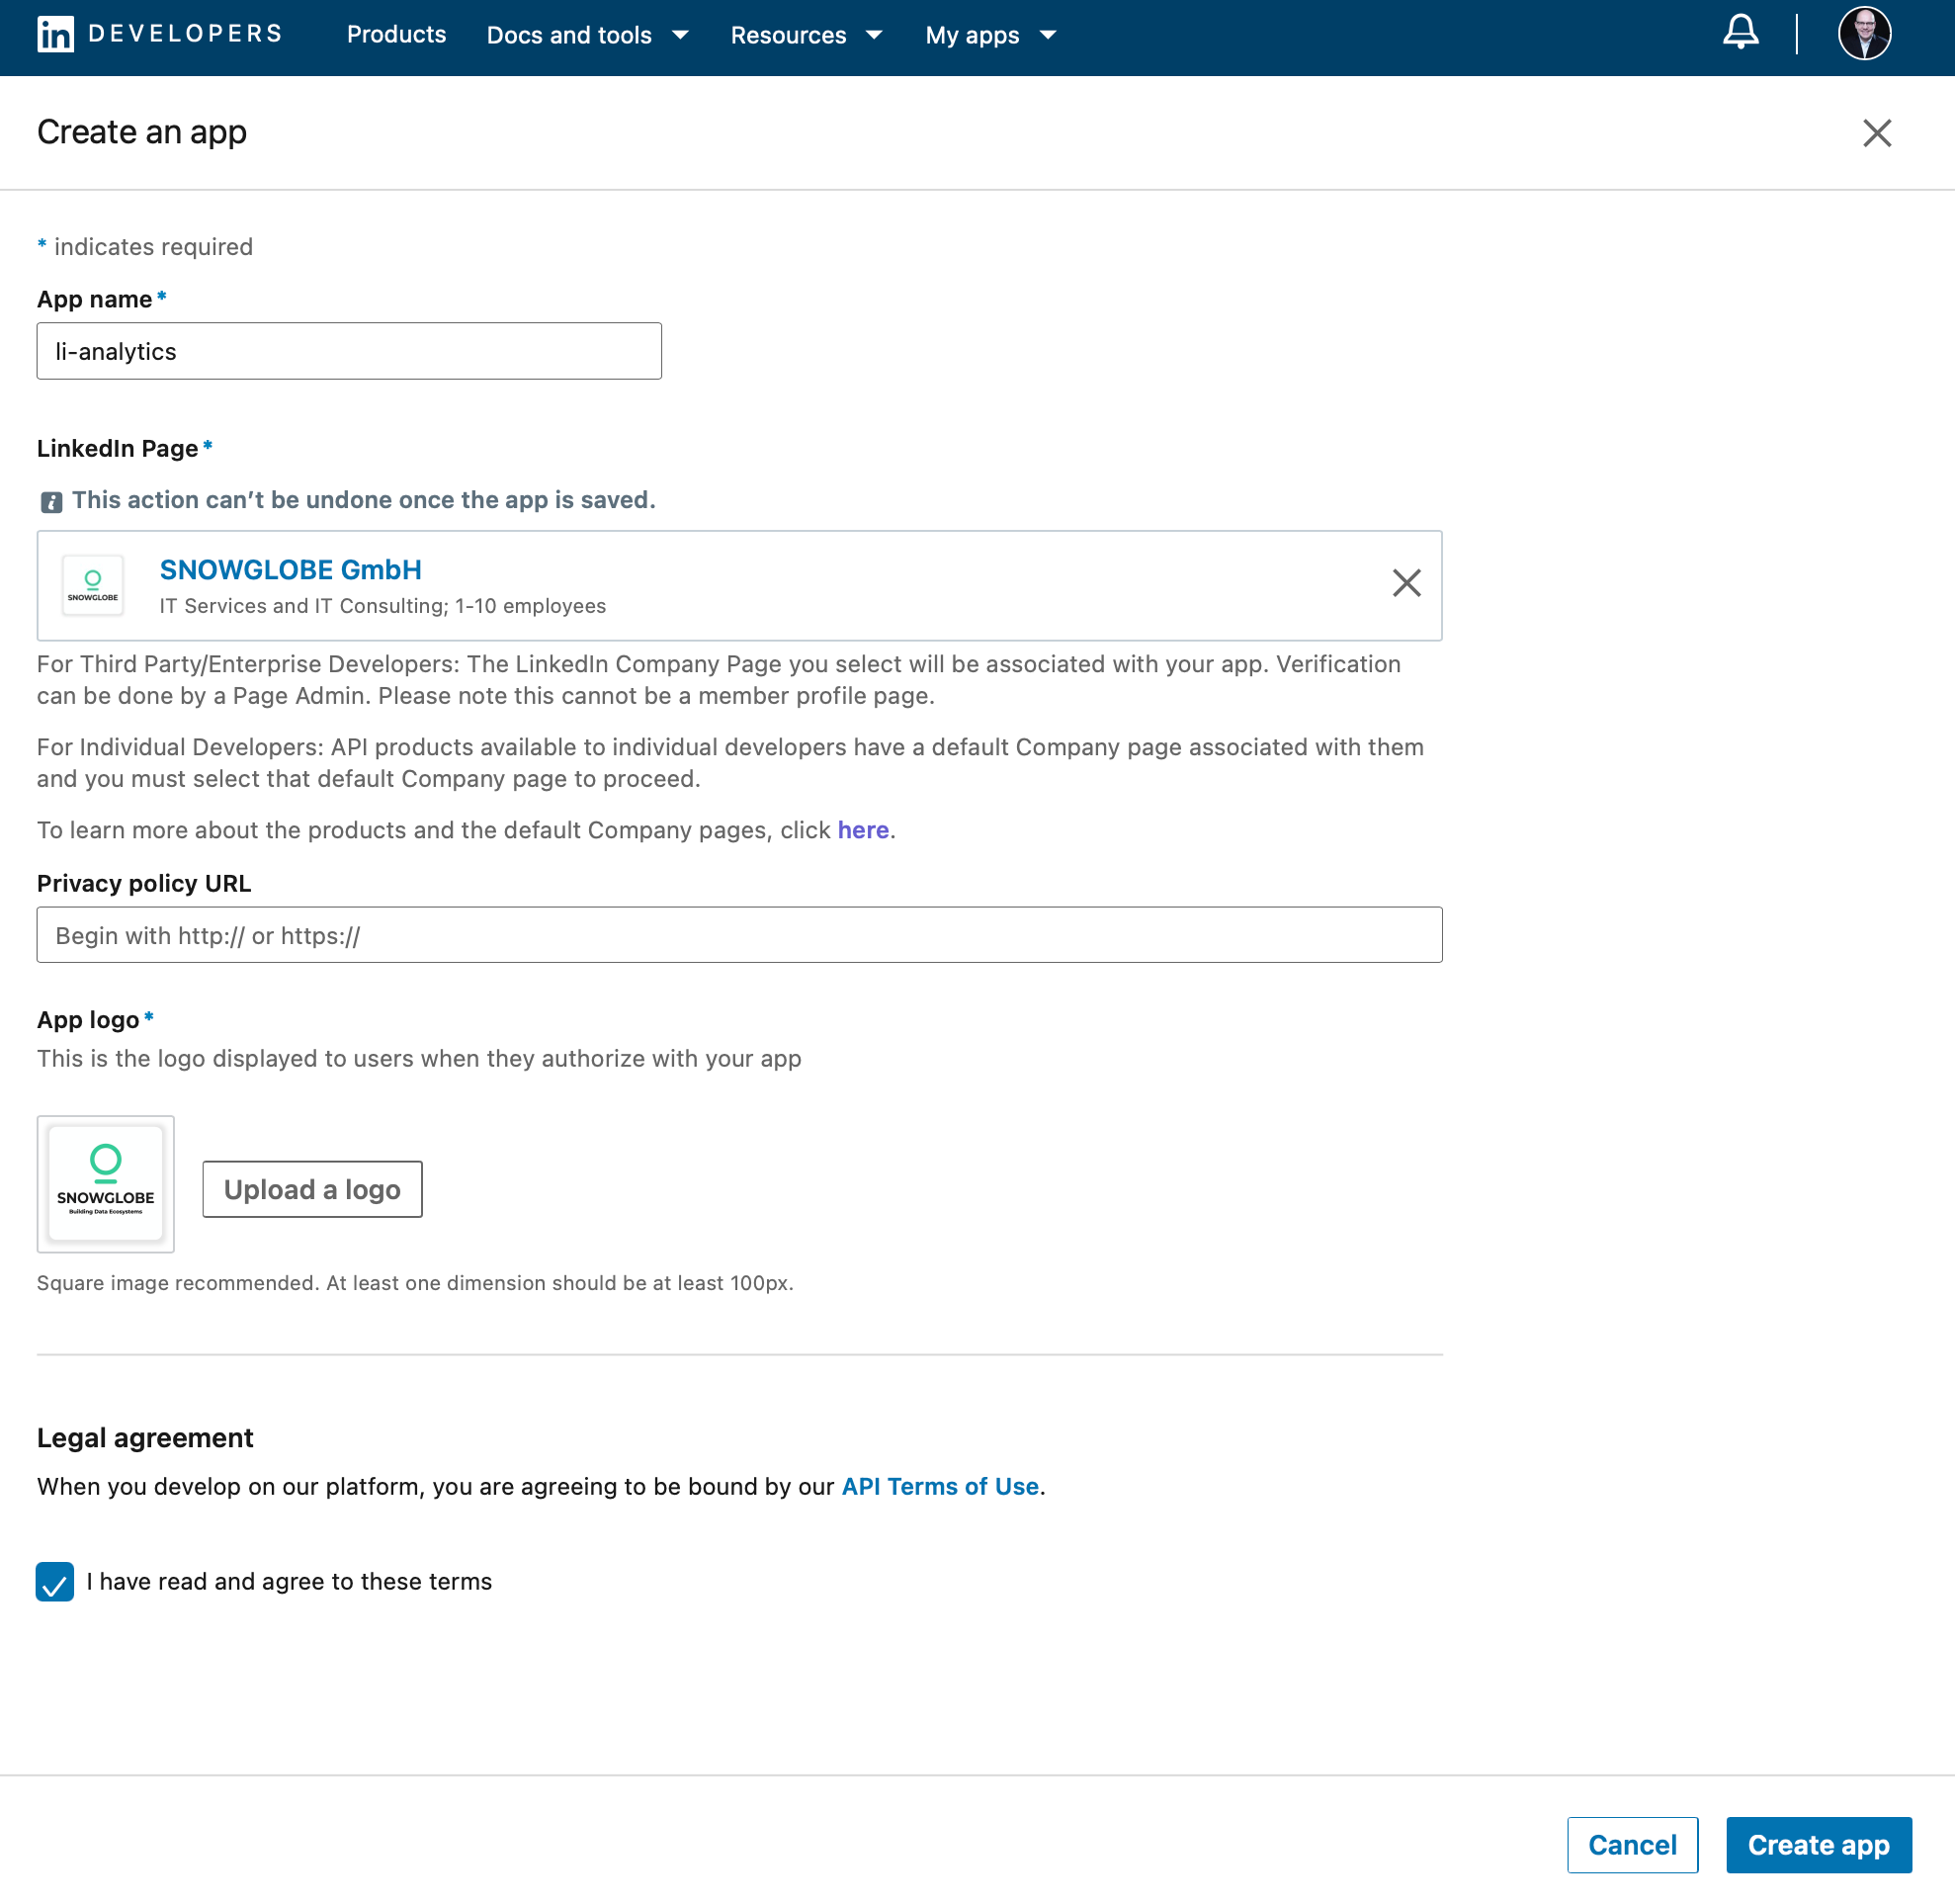
Create a LinkedIn Page for an Organization
You need an organization page to back your developer application. In my case, I have an organization page for my consulting company SNOWGLOBE anyway. So I went with this, but I think you can create a page for your purpose, but note that later you have to provide details for your organization like homepage and address that will be reviewed by LinkedIn before approval. If you want to use your company's existing page, make sure you know the page administrator, who will need to approve your developer application.
Turns out, this is the trickiest part. LinkedIn can deny API access for your organization without providing a reason. You could get the impression that they don't want individuals to use their API.
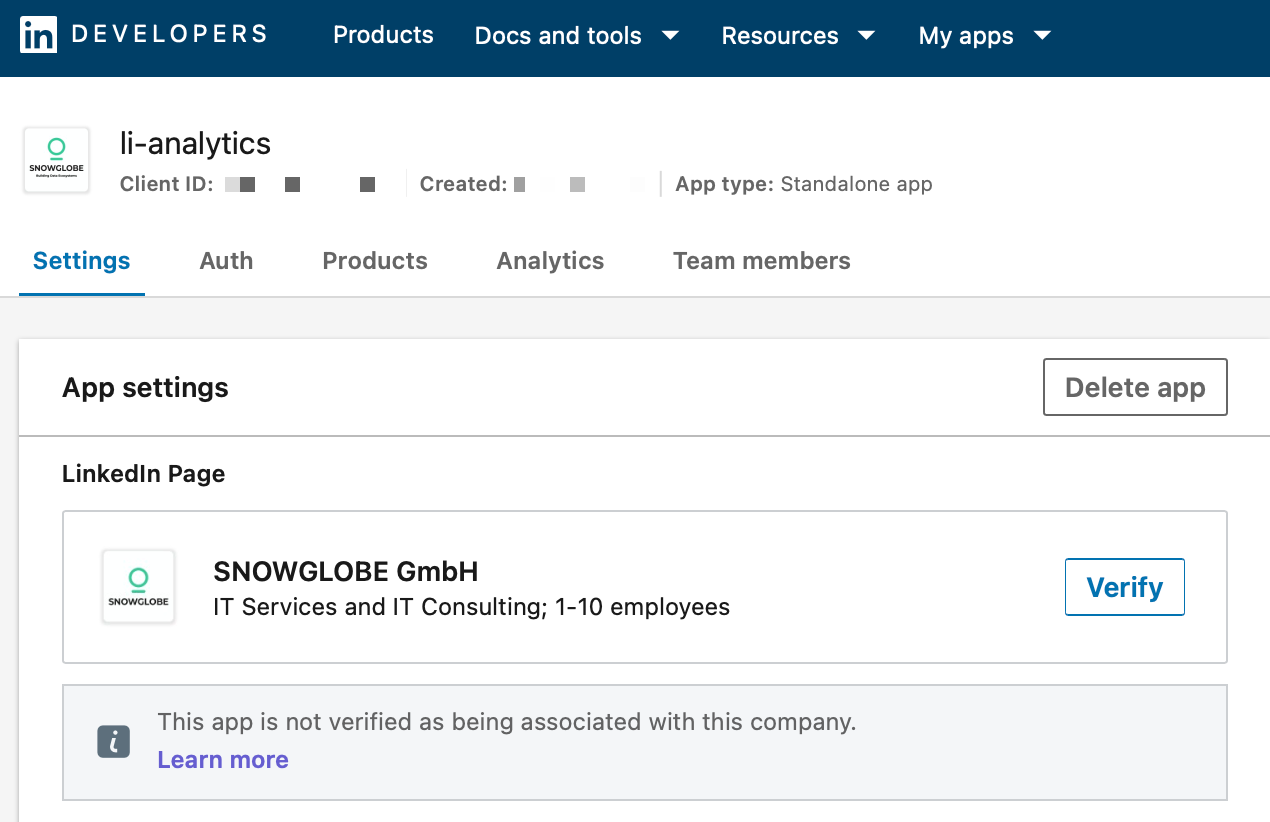
Create a Developer Application
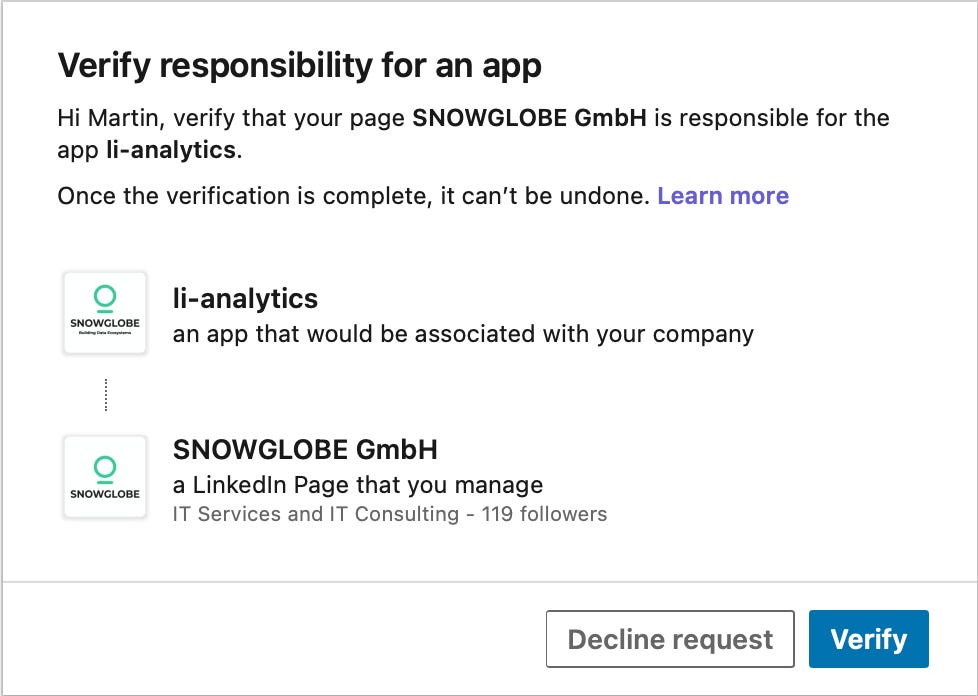
The LinkedIn Developer Portal allows you to create a developer application. Once created, the page has to be verified by an administrator of the organization page. In the Settings tab of your newly created application, click on the Verifiy button. You will get a URL you can send to an admin to verify your application.
Request Access to the Community Management API
In the Products tab of your application, request access to the Community Management API. This covers all the analytics endpoints we need, for both your personal profile and your organization.
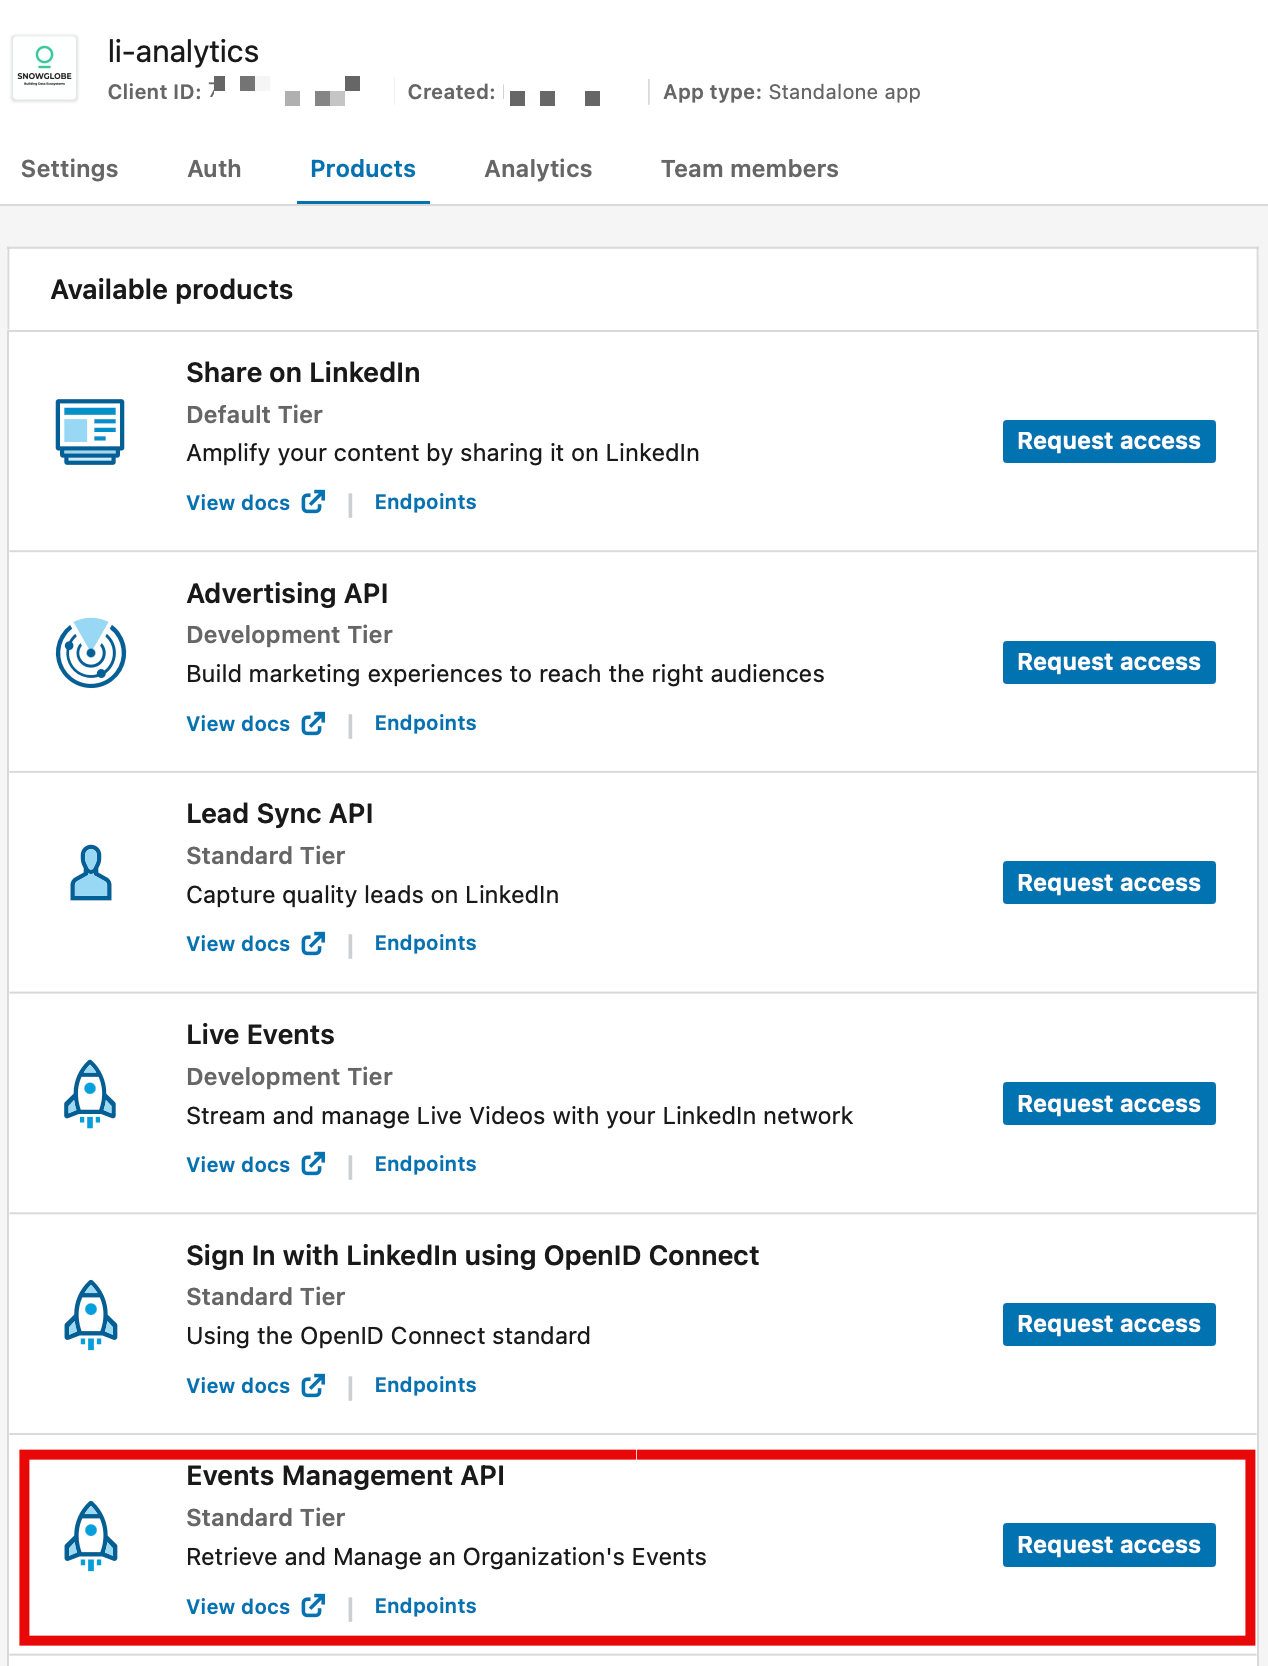
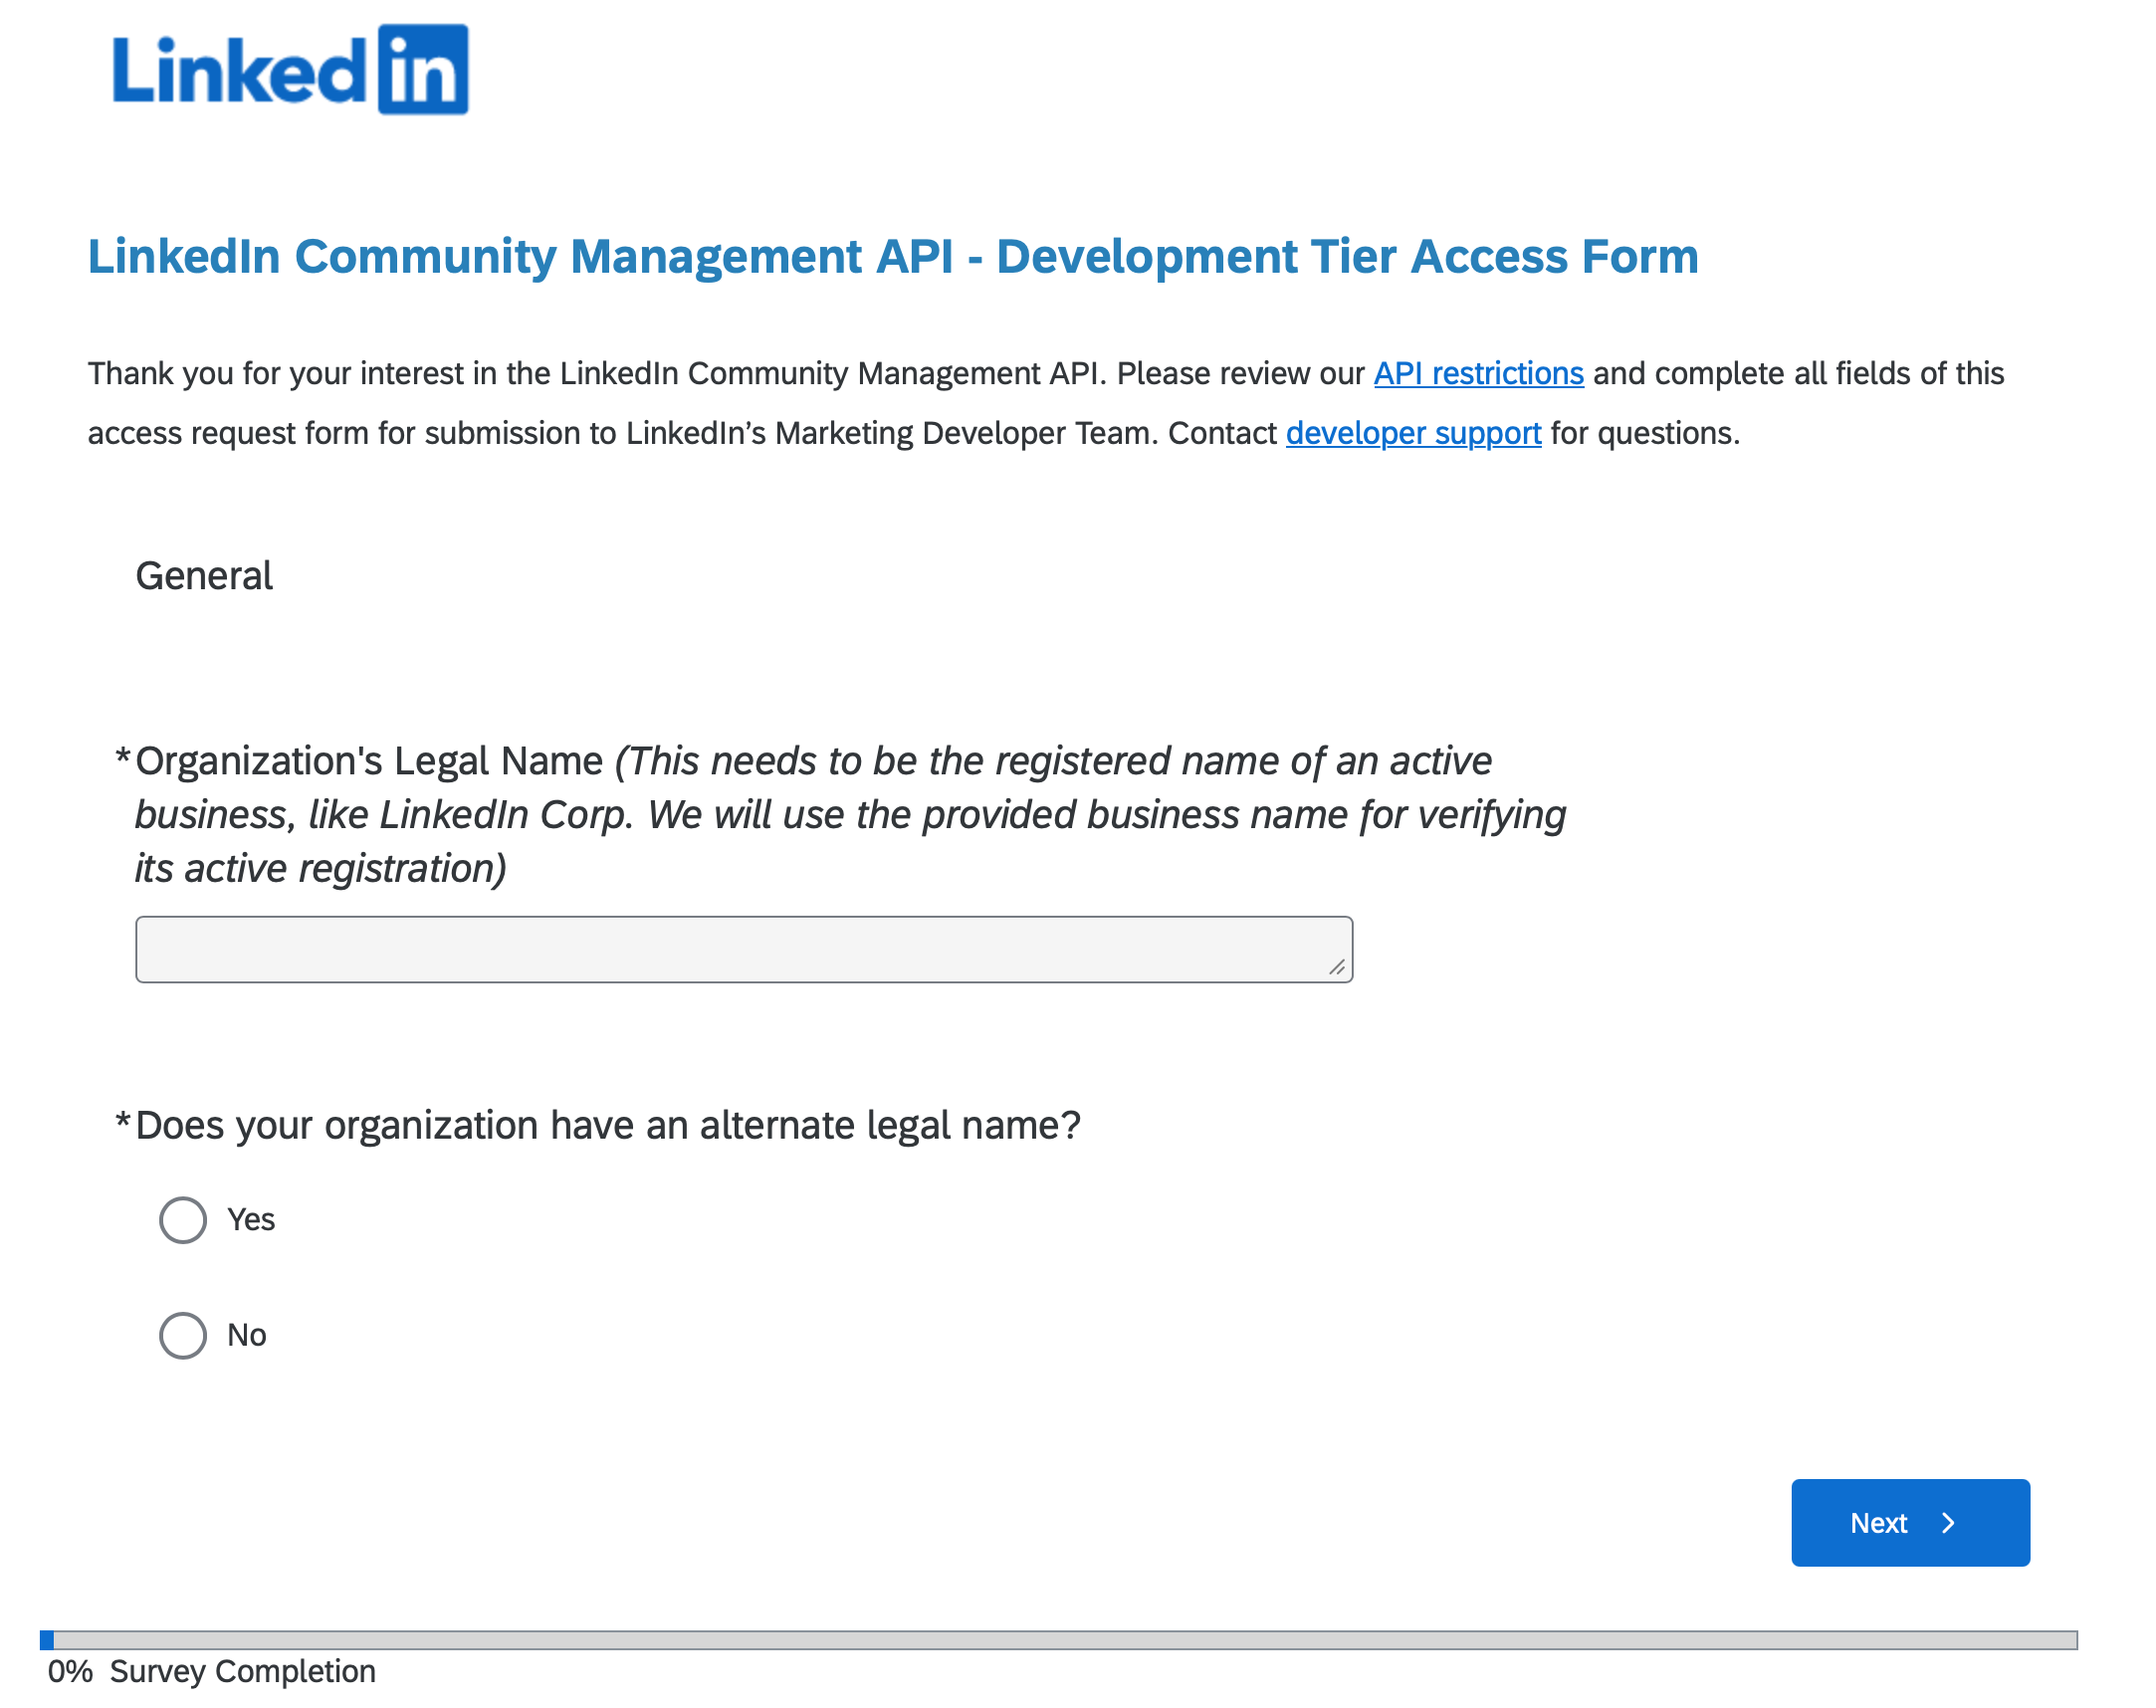
LinkedIn will ask you to verify your business email and fill out a Development Tier Access Form with details about your use case and organization. Once approved, the API endpoints are unlocked.
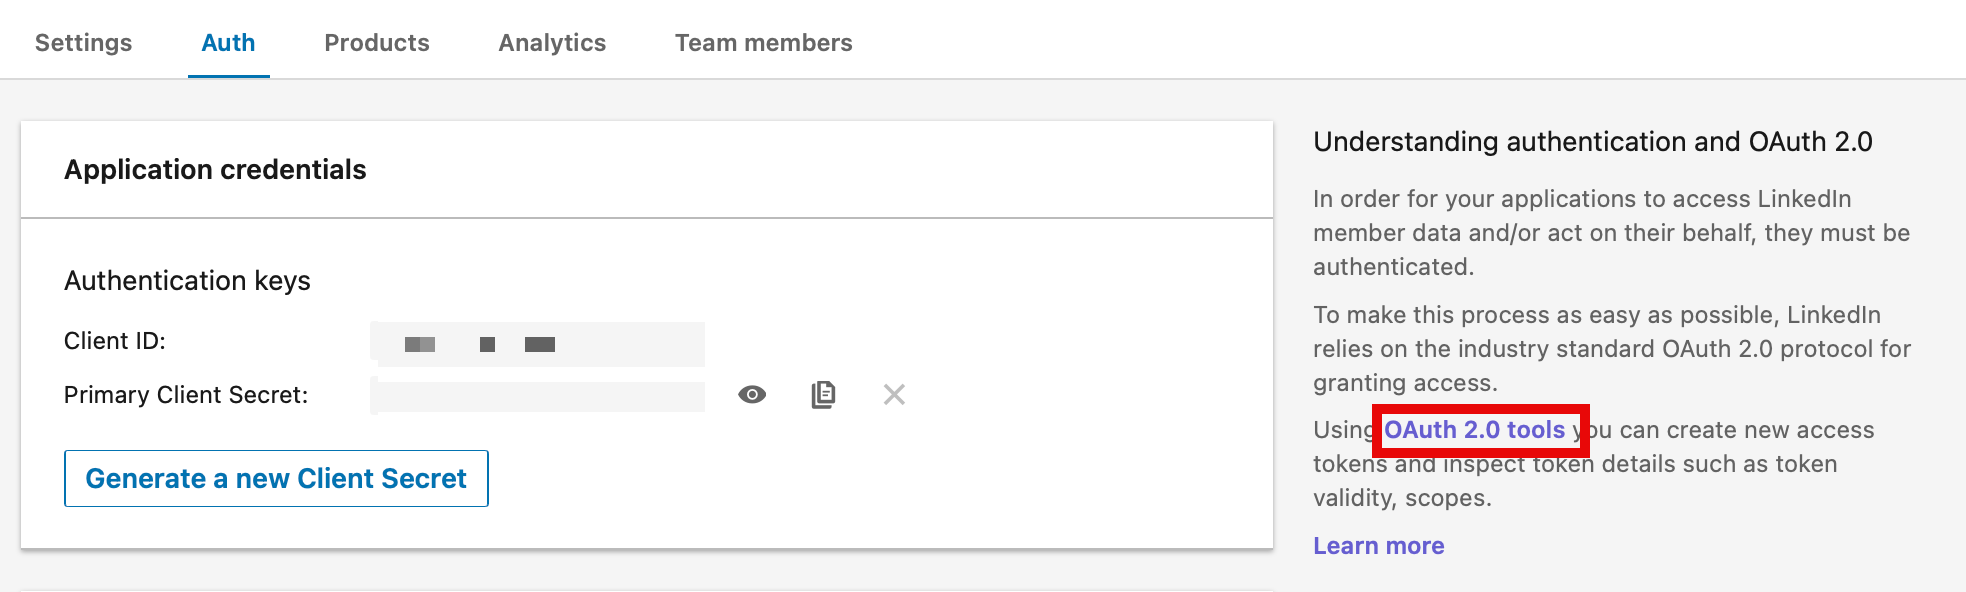
Create an Access Token
In order to use the API, you have to create an access token in the Developer Portal. In the Auth tab of your application, click on the OAuth 2.0 tools link in order to generate a Token. For this pipeline, the required scopes are:
r_member_postAnalytics
r_member_profileAnalytics
Storing the Token securely
The access token should not live in the code or notebook. Ever. Not hardcoded, not in a widget default value, not in a comment. A notebook that gets committed to source control with a token in it is a security incident waiting to happen.
The production pattern here is:
1. Store the token in Azure Key Vault
2. Back the Key Vault with a Databricks secret scope
3. Retrieve it at runtime with dbutils.secrets.get()
access_token = dbutils.secrets.get(”secret-scope-key-vault-adb”, “linkedin-token”)This means the token never appears in logs, never gets printed to a notebook output cell, and never touches source control. Databricks redacts secret values automatically in cell outputs. if you accidentally print the token, you’ll see [REDACTED] instead of the actual value.
If you're running in Databricks Free Edition without Key Vault, you can use a Databricks-backed secret scope as an alternative.
In the following sections, I outline how to get the data from the API. Only excerpts of the code is shown. Please visit my GitHub for the full ingestion notebook.
The five endpoints that matter
For a personal LinkedIn analytics pipeline, there are exactly five calls you need using the Community Management member analytics APIs. All of them sit under api.linkedin.com/rest/.
The full code is available in the accompanying GitHub Repo. Click the Button below to view the repo.
Follower delta by date (1)
This gives you the net change in followers for each day within a date range. The response comes back as a list of elements, one per day, each with a DateRange object and a memberFollowersCount field.
url = f”https://api.linkedin.com/rest/memberFollowersCount?q=dateRange&dateRange=(start:({start}),end:({end}))”Total follower snapshot (2)
This gives you your current total follower count as a snapshot at the moment of the API call. There’s no date range parameter here, it’s just “right now.” I’ll come back to why this creates an interesting data modeling problem.
url = “https://api.linkedin.com/rest/memberFollowersCount?q=me”Post analytics (3, 4, 5)
The memberCreatorPostAnalytics endpoint serves impressions, reactions, and comments depending on the queryType parameter. Each is a separate API call with aggregation=DAILY and a date range.
# Impressions
url = f”https://api.linkedin.com/rest/memberCreatorPostAnalytics?q=me&queryType=IMPRESSION&aggregation=DAILY&dateRange=(start:({start}),end:({end}))”

# Reactions
url = f”https://api.linkedin.com/rest/memberCreatorPostAnalytics?q=me&queryType=REACTION&aggregation=DAILY&dateRange=(start:({start}),end:({end}))”

# Comments
url = f”https://api.linkedin.com/rest/memberCreatorPostAnalytics?q=me&queryType=COMMENT&aggregation=DAILY&dateRange=(start:({start}),end:({end}))”
Initially, I wanted to pull the metrics for each individual post as well. Unfortunately, I was not able to accomplish that although I followed the documentation. If you have done it successfully please reach out to me and share your solution.
The date format LinkedIn expects
LinkedIn’s API does not use ISO 8601 date strings. It uses a custom struct format that looks like this:
(start:(year:2024,month:3,day:1),end:(year:2024,month:3,day:31))This is LinkedIn’s Restli protocol format. Perfectly parseable, but unusual enough that it trips people up the first time they look at the API reference. The Python to generate it looks like this:
import datetime as dt

end_dt = dt.datetime.now() - dt.timedelta(days=1)
end = f”year:{end_dt.year},month:{end_dt.month},day:{end_dt.day}”

start_dt = end_dt - dt.timedelta(days=60)
start = f”year:{start_dt.year},month:{start_dt.month},day:{start_dt.day}”
Note the minus one day on end_dt. LinkedIn’s data for “today” isn’t fully settled yet when you’re running a 6am job, so I always pull up through yesterday to avoid partial-day numbers showing up in the pipeline.
The Required Headers
Every request needs three headers beyond the authorization token:
headers = {
  ‘Authorization’: f’Bearer {access_token}’,
  ‘Content-Type’: ‘application/json’,
  ‘X-Restli-Protocol-Version’: ‘2.0.0’,
  ‘Linkedin-Version’: ‘202506’
}
The X-Restli-Protocol-Version: 2.0.0 header is required for the Restli query syntax to work. Without it, LinkedIn either rejects the request or returns an unexpected response shape.
The Linkedin-Version header pins you to a specific API version. LinkedIn’s REST API is versioned by date (year + month), and they do deprecate old versions. Pinning this explicitly in code means your pipeline doesn’t silently break when LinkedIn releases a new API version with a different response schema.
The silent failure to watch out for
This one cost me time. LinkedIn’s API returns HTTP 200 with an error payload when the token expires. It looks like a success to your HTTP client, but the body contains something like:
{
  “code”: "EXPIRED_ACCESS_TOKEN",
  “message”: “The token used in the request has expired”
}
A naive response.raise_for_status() call will not catch this. The request returned 200, so as far as requests is concerned, everything is fine. Your pipeline runs, writes a file with an error body to storage, and you won’t notice until you wonder why your follower count is null.
The fix is a second check after deserializing the response:
def get_linkedin_data(url, access_token):
    response = requests.get(url, headers=headers)
    response.raise_for_status()
    data = response.json()

# LinkedIn can return error details with HTTP 200
if “status” in data and data[”status”] >= 400:
  raise RuntimeError(f”LinkedIn API error {data[’status’]}: {data.get(’message’, data)}”)

return data
This pattern, checking for an error status in the response body after already checking the HTTP status code, is worth keeping in any LinkedIn API integration. It’s explicitly handled in the bronze transformation layer too, which I’ll cover in Part 3.
Storing the data: landing in a Databricks Volume
Once you have the API responses, you need somewhere to put them. I’m writing raw JSON directly to a Databricks Unity Catalog Volume. Each API call produces one timestamped file:
def write_data_to_json_file(data, path, file_prefix):
    timestamp = dt.datetime.now().strftime(”%Y%m%d%H%M%S”)
    file_path = f”{path}{file_prefix}{timestamp}.json”
    dbutils.fs.put(file_path, json.dumps(data), overwrite=True)
The directory structure in the volume mirrors the data type:
/Volumes/<catalog>/bronze_linkedin/landing/
├── followers/          followers_20260315060112.json
├── followers_agg/      followers_agg_20260315060114.json
├── impressions/        impressions_20260315060118.json
├── reactions/          reactions_20260315060121.json
└── comments/           comments_20260315060124.json
The timestamp in the filename turns out to be more than just cosmetic. The followers_count endpoint (the q=me one that returns your current total) doesn’t include a date in its response. It’s a point-in-time snapshot. In the transformation layer, I derive the date of that snapshot from the filename timestamp itself. More on that in Part 2.
Initial load vs. delta
My example notebook accepts a run_type parameter with two values: initial and delta.
Initial load pulls everything from January 2020 to yesterday. You run this once when you first set up the pipeline.
Delta load pulls a rolling 60-day window ending yesterday. This is what runs every morning. The 60-day window is intentionally wider than one day to handle late-arriving data and to make re-runs safe. If a day’s job fails and you re-run it the next day, you’ll pick up yesterday’s data within the delta window without needing a manual backfill.
if run_type == “delta”:
    start_dt = end_dt - dt.timedelta(days=60)
    start = f”year:{start_dt.year},month:{start_dt.month},day:{start_dt.day}”
else:
    start = f”year:2020,month:1,day:1”
Why 60 days and not 7, or 30? LinkedIn’s analytics data can be revised retroactively for a few days after the fact. A wider window means the pipeline naturally self-corrects if LinkedIn updates historical numbers. The deduplication logic in the silver layer (covered in Part 3) handles the overlapping records cleanly using CDC upserts keyed by date.
The full code is available in the accompanying GitHub Repo. Click the Button below to view the repo.
Adding the notebook to the bundle
Now we wire the notebook into the bundle as a job task. Create bundles/projects/linkedin/resources/jobs.yml:
resources:
  jobs:
    linkedin_ingest:
      name: linkedin-medallion

      parameters:
        - name: catalog
          default: ${var.catalog}
        - name: schema
          default: ${resources.schemas.bronze_linkedin.name}
        - name: volume
          default: ${resources.volumes.landing.name}
        - name: run_type
          default: ${var.run_type}

      run_as:
        service_principal_name: ${var.service_principal_app_id}

      email_notifications:
        on_success:
          - <your-email@domain.com>
        on_failure:
          - <your-email@domain.com>

      tasks:
        - task_key: ingest
          notebook_task:
            notebook_path: ../notebooks/ingest.ipynb
          environment_key: serverless

      environments:
        - environment_key: serverless
          spec:
            client: "4"
The job passes the catalog, schema, volume, and run_type down to the notebook as parameters, and the notebook reads them via dbutils.widgets. The service principal identity runs the job, and email notifications alert you on both success and failure.
Note there’s only one task here for now. In Part 3 we’ll add the pipeline task as a second step with an explicit dependency on this ingest task.
Deploy the updated bundle:
databricks bundle deploy --target dev-userRun it manually and verify
Trigger a manual run from the Databricks UI (or via the CLI: databricks bundle run linkedin_ingest --target dev-user). Set run_type to initial for the first run to pull the full historical data.
When it completes, navigate to your catalog in the workspace, open the bronze_linkedin schema, click on the landingvolume, and browse the folder structure. You should see JSON files in each of the five subdirectories, timestamped from this run.
That’s the data. In Part 3 we’ll build the Declarative Pipeline that reads these files, transforms them through bronze and silver, and produces a clean daily_metrics gold table.
What’s next
Part 3 covers the transformation layer: streaming tables for incremental file ingestion, CDC upserts for idempotent daily records, and a materialized view to join all five metrics into a single queryable table. We'll also add the pipeline as the second task in the job so that ingestion and transformation run end-to-end automatically.
Part 3 will be published 2026/05/28.