
Building a LinkedIn Analytics Pipeline on Databricks — Part 1: Project Setup with Declarative Automation Bundles
Part 1 of 4 of the Series on getting LinkedIn data into Databricks

This is the first post in a four-part series. Part 2 covers connecting to the LinkedIn API and pulling your analytics data. Part 3 covers building the medallion pipeline with Declarative Pipelines. Part 4 covers creating a dashboard and cost of running this pipeline..
Ever since I started posting regularly on LinkedIn, I wanted to have my metrics (follower count, impressions, comments, reactions) not just in the LinkedIn UI, but in my own Databricks Lakehouse. Something I own, can query freely, and that accumulates history indefinitely rather than disappearing behind a rolling API window.
It turns out this is also a near-perfect project for learning how to build a proper Lakehouse-style data pipeline. It has everything: data ingestion via API, processing through the medallion layers (Bronze, Silver, Gold), and insights delivered via a dashboard as the end result. Not a toy example, not an enterprise-scale complexity monster, just a real use case at a manageable size, with all the patterns that matter.
Across four posts, we’ll build this end to end. By the time we’re done you’ll have a pipeline that runs automatically every morning, a clean daily metrics table in Unity Catalog, and a Lakeview dashboard on top of it, all deployed from version-controlled code.
Before writing a single line of pipeline code, I want to set up the project properly. That means infrastructure as code from the start: schemas, volumes, jobs, pipelines, all defined in version-controlled YAML and deployable to any environment with a single command.
The tool that makes this possible on Databricks is Declarative Automation Bundles. If you set this up first, everything that follows in Parts 2, 3, and 4 slots in cleanly. If you skip it and create resources manually, you’ll eventually want to come back and do it properly anyway.
So let’s start here.
What are Declarative Automation Bundles?
A Declarative Automation Bundle (DAB, formerly known as Databricks Asset Bundles) is a project format that packages your Databricks code and resource definitions together. You define everything (jobs, pipelines, schemas, volumes, dashboards) as YAML files alongside your SQL and Python code, commit it all to source control, and use the Databricks CLI to deploy to any target workspace.
The mental model is similar to Terraform, but Databricks-native. The CLI understands the relationships between resources, handles variable substitution across environments, and deploys notebooks and SQL files alongside the infrastructure that runs them.
Prerequisites
To follow along you’ll need:
A Databricks workspace with Unity Catalog enabled
A catalog where you have permission to create schemas (or an existing catalog you can use)
The Databricks CLI installed (official docs)
A terminal and a code editor like VS Code
A service principal added to your Databricks workspace. Create one either via Azure Entra ID and add it to your workspace or create a Databricks scoped SP directly in the Databricks UI. Note down its application (client) ID, you’ll need it shortly.
Authenticate the CLI against your workspace. The recommended approach with the newer Databricks CLI (v0.200+) is OAuth, which opens a browser for interactive login, no token to create or manage:
databricks auth login --host https://<your-workspace-url>Alternatively, if you prefer a personal access token, use:
databricks configure --tokenProject structure
Now we can start creating our resource definitions. In order to that, we need a repo with a proper project structure. I will go with a structure that separates shared infrastructure from project-specific resources. Here’s the full folder layout we’ll build across this series:
bundles/
├── databricks.yml # Root bundle config
├── resources/
│   └── sql-warehouses.yml # Shared SQL warehouse
└── projects/
    └── linkedin/
        ├── resources/
        │   ├── jobs.yml # The daily ingest job
        │   ├── pipelines.yml # The Declarative Pipeline
        │   ├── schemas.yml # Bronze, silver, gold schemas
        │   └── volumes.yml # Landing volume
        └── src/
            ├── dashboards/
            │    └── linkedin.lvdash.json # Dashboard
            ├── notebooks/
            │   └── ingest.ipynb # LinkedIn API ingest notebook
            └── pipelines/
                 ├── load_bronze.sql
                 ├── load_silver.sql
                 └── load_gold.sql
In this post we’ll create the bundle root, the shared warehouse, and the LinkedIn project’s schemas and volume. By the end you’ll have a working databricks bundle deploy that creates real resources in your workspace.
The structure is built for growth. You can easily add more projects like linkedin and deploy them in one bundle. However, when things get really big and you have several completely separated data products, I recommend to go with multiple bundles. But for this use case we are good to go with this structure with some room for further development.
The full code is available in the accompanying GitHub Repo. Click the Button below to view the repo.
The root bundle configuration
Create bundles/databricks.yml. This is the entry point for everything:
bundle:
  name: my-lakehouse

include:
  - resources/*.yml
  - projects/*/resources/*.yml

variables:
  catalog:
    description: "Unity Catalog catalog name for this target"
  service_principal_app_id:
    description: "Application (client) ID of the service principal used to run jobs"

targets:

  dev-user:
    mode: development
    workspace:
      host: https://<your-workspace-url>.azuredatabricks.net
    variables:
      catalog: <your-dev-catalog>
      service_principal_app_id: <your-sp-app-id>

  dev:
    mode: production
    workspace:
      host: https://<your-workspace-url>.azuredatabricks.net
      root_path: /Users/${var.service_principal_app_id}/.bundle/${bundle.name}/${bundle.target}
    variables:
      catalog: <your-dev-catalog>
      service_principal_app_id: <your-sp-app-id>

  prod:
    mode: production
    workspace:
      host: https://<your-prod-workspace-url>.azuredatabricks.net
      root_path: /Users/${var.service_principal_app_id}/.bundle/${bundle.name}/${bundle.target}
    variables:
      catalog: <your-prod-catalog>
      service_principal_app_id: <your-prod-sp-app-id>
A few things to understand here:
include tells the bundle which YAML files contain resource definitions. The glob patterns mean any new project you add under projects/ is automatically picked up without touching the root config.
variables defines the parameters that differ between environments, primarily the catalog name and the service principal identity. These are referenced throughout all resource files as ${var.catalog} and ${var.service_principal_app_id}.
targets defines three environments, and the distinction between dev-user and dev is worth explaining.
dev-user is for active development on your local machine. It uses mode: development, which automatically prefixes all deployed resource names with your username (e.g. martin_linkedin-medallion instead of linkedin-medallion). This means multiple developers can deploy their own version of the project to the same shared workspace simultaneously without stepping on each other.
dev is an integration environment. It uses mode: production (no name prefixing) and deploys to a fixed path owned by the service principal. The purpose is to have a stable, always-running version of the pipeline in the dev catalog that you can validate against before deploying to prod. It’s what you’d point a shared team dashboard at, for example.
prod is a completely separate workspace with its own catalog and service principal, isolated from dev by design.
If you’re working alone or just getting started, you can simplify to just dev-user and prod pointing at the same workspace with different catalogs. The key is that prod should always use a separate catalog from dev.
Shared resources: the SQL warehouse
Create bundles/resources/sql-warehouses.yml:
resources:
  sql_warehouses:
    serverless_warehouse:
      name: "serverless-warehouse"
      cluster_size: "2X-Small"
      warehouse_type: PRO
      enable_serverless_compute: true
      auto_stop_mins: 10
      channel:
        name: CHANNEL_NAME_CURRENT
This warehouse will be used by the Lakeview dashboard we add in Part 4. It’s defined at the bundle level (not inside the LinkedIn project folder) because it’s shared infrastructure, and other projects in the same bundle can reference it.
enable_serverless_compute: true means the warehouse uses serverless compute rather than classic clusters. auto_stop_mins: 10keeps costs low by shutting down after 10 minutes of inactivity.
If you are running this on Databricks Free Edition, make sure to remove the SQL Warehouse by commenting out the
resources/*.ymlinclude in thedatabricks.yml. There is only one Warehouse allowed in the Free Edition and you will run into a long running (30 mins) deployment and finally into an error. You can use the Warehouse provided by Databricks Free Edition later on.
Project resources: schemas and volumes
Create bundles/projects/linkedin/resources/schemas.yml:
resources:
  schemas:
    bronze_linkedin:
      name: bronze_linkedin
      catalog_name: ${var.catalog}
      comment: "Raw ingested data from LinkedIn"
      grants:
        - principal: <your-user@email.com>
          privileges:
            - ALL_PRIVILEGES
        - principal: ${var.service_principal_app_id}
          privileges:
            - ALL_PRIVILEGES

    silver_linkedin:
      name: silver_linkedin
      catalog_name: ${var.catalog}
      comment: "Cleaned and deduplicated LinkedIn data"
      grants:
        - principal: <your-user@email.com>
          privileges:
            - ALL_PRIVILEGES
        - principal: ${var.service_principal_app_id}
          privileges:
            - ALL_PRIVILEGES

    gold_linkedin:
      name: gold_linkedin
      catalog_name: ${var.catalog}
      comment: "Aggregated LinkedIn metrics for reporting"
      grants:
        - principal: <your-user@email.com>
          privileges:
            - ALL_PRIVILEGES
        - principal: ${var.service_principal_app_id}
          privileges:
            - ALL_PRIVILEGES
Three schemas, one per medallion layer. Each has grants defined inline, meaning your user account and the service principal both get full access. When you deploy to a new environment, the grants are applied automatically. No manual permission management in the UI.
Now create the landing volume in bundles/projects/linkedin/resources/volumes.yml:
resources:
  volumes:
    landing:
      name: landing
      catalog_name: ${var.catalog}
      schema_name: ${resources.schemas.bronze_linkedin.name}
      volume_type: MANAGED
      comment: "Landing zone for raw LinkedIn API data before loading into Delta tables"
The volume lives inside bronze_linkedin and uses MANAGED storage, meaning Databricks controls where the files are stored. The ${resources.schemas.bronze_linkedin.name} reference means the bundle knows the schema must exist before the volume can be created, and the bundle handles the dependency ordering automatically.
The full code is available in the accompanying GitHub Repo. Click the Button below to view the repo.
First deploy
With the root config, the warehouse, the schemas, and the volume in place, you can do your first deploy via terminal in VS Code (being in the bundles root folder):
databricks bundle deploy --target dev-userThe CLI will validate your configuration, resolve all variable substitutions, and create the resources in your workspace. The validation can be done without deploying to check if everything is in order. For that, just use validate instead of deploy:
databricks bundle validate --target dev-userDuring deployment, you should see output like:

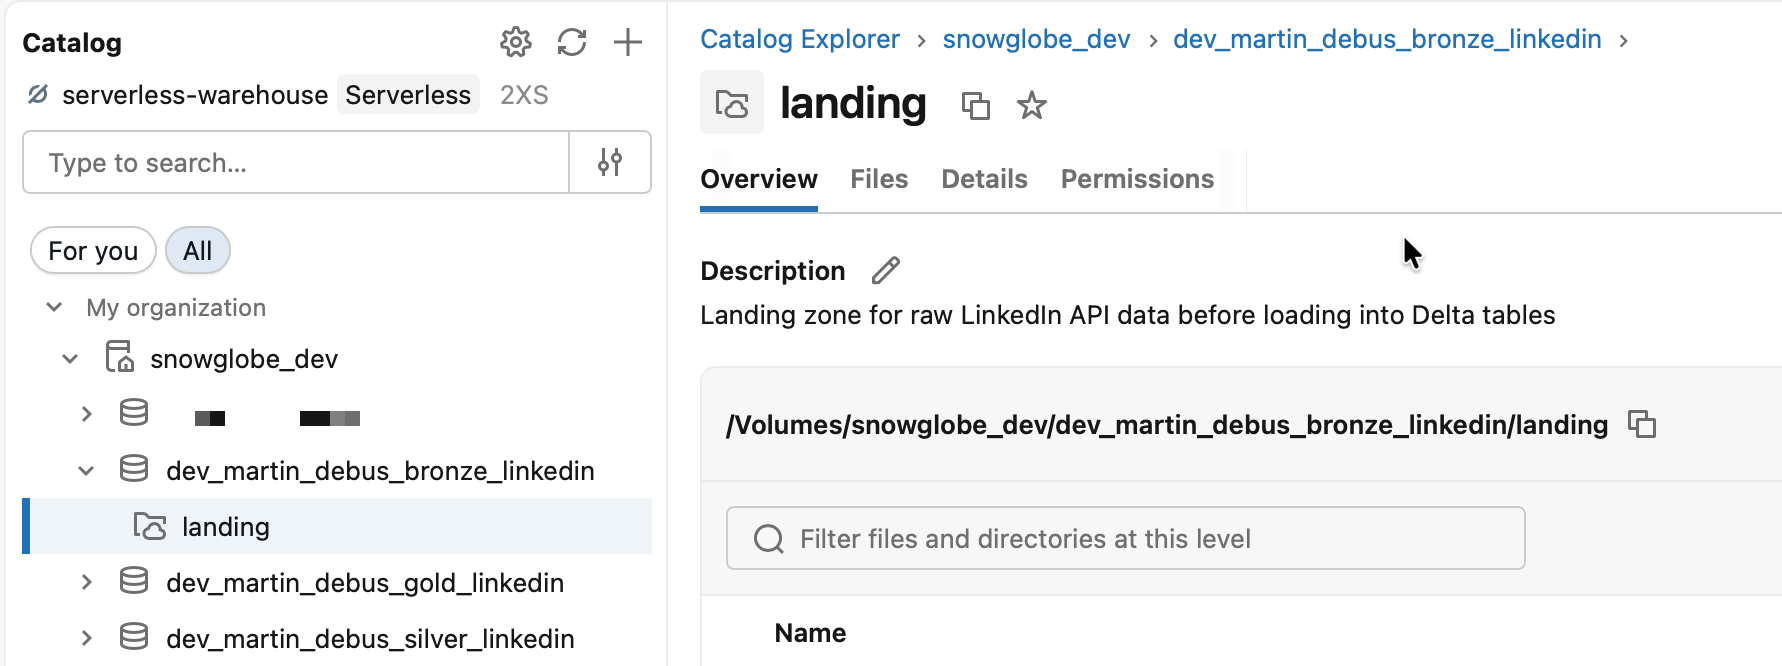
Open your Databricks workspace, navigate to the catalog, and you’ll see the three schemas and the landing volume already there, exactly as defined.
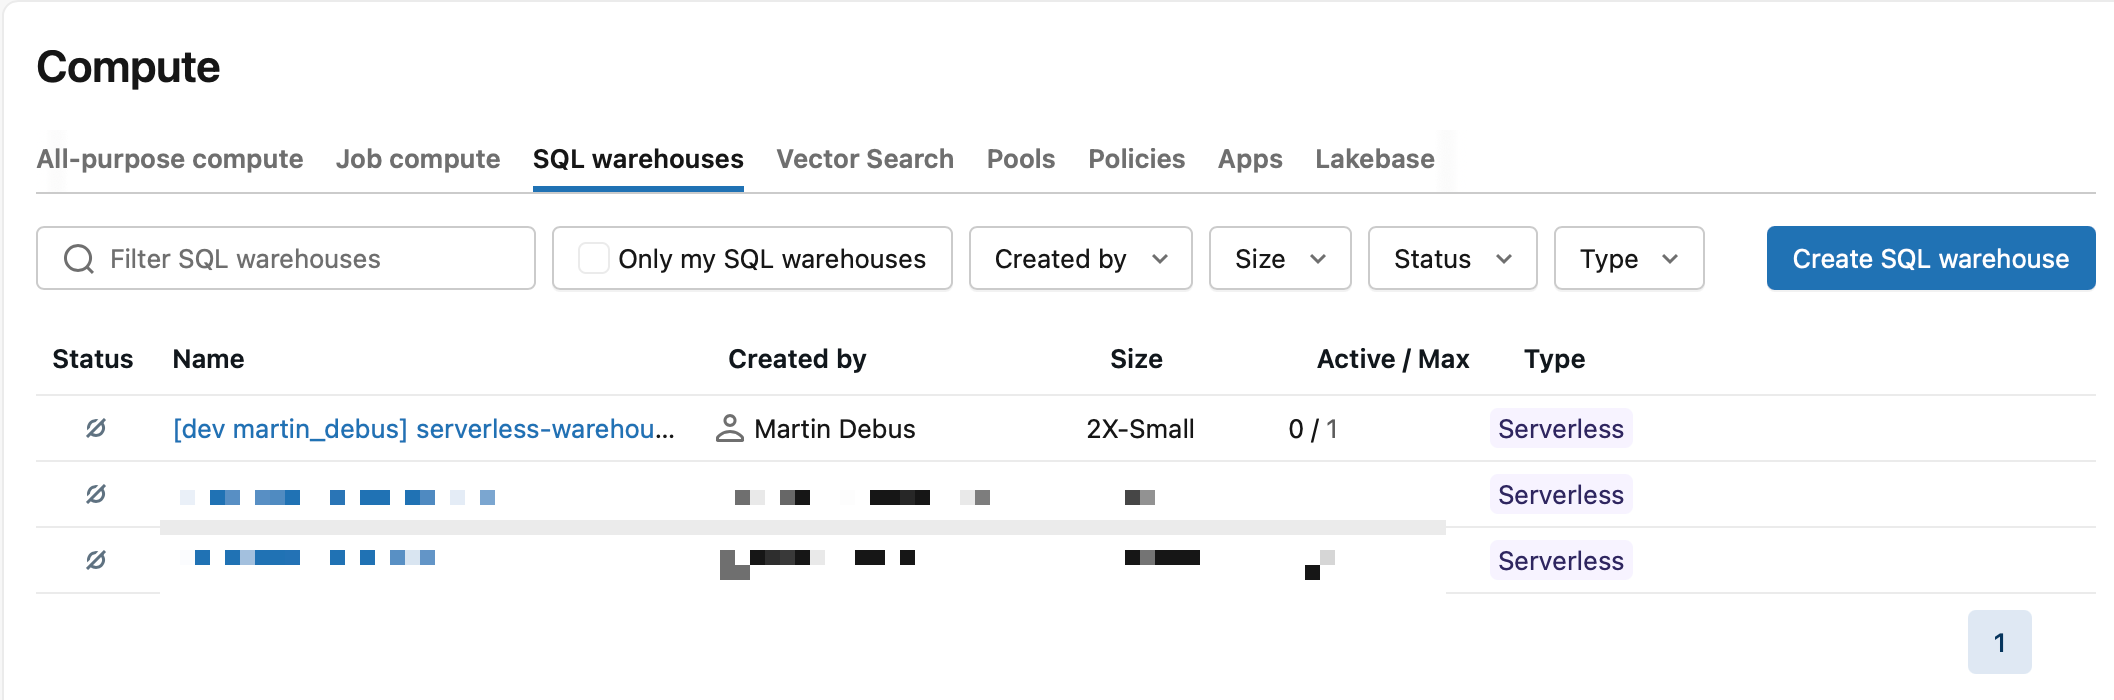
The prefixed shared Serverless SQL Warehouse should appear in the SQL Warehouses section.
Nothing runs yet (although the Serverless SQL Warehouse is started after deployment, but will shut down after 10 minutes if you not terminate it manually). There’s no job, no pipeline, no notebook. But the scaffolding is in place and version-controlled. Everything we add in Parts 2, 3, and 4 will slot into this structure.
If you want to start from scratch, you can destroy all deployed resources like this:
databricks bundle destroy --target dev-userYou get prompted before anything critical like Schemas are destroyed (if they contain data).
What’s next
In Part 2 we’ll connect to the LinkedIn API, walking through the API access setup, building the ingest notebook step by step, and wiring it into the bundle as the first job task. By the end of Part 2 you’ll have raw JSON files landing in the Volume you just created.
Part 2 will be published 2026/04/30.
Creating something similar like this has been long on my list, very nice blog!